Friday, December 31, 2010

THE Jucy Lucy!

Last post of the year and I promise not to disappoint!.

The Jucy Lucy (or Juicy Lucy) is a cheeseburger with the cheese inside the meat so that the cheese in the middle melts to a molted core when cooked (doesn't that sound so delicious!!). It originated from South Minneapolis in the 1950's, however there are two bars on the same street that claim to be the inventor of this delicious masterpiece. Depending on who you ask it's either Matt's bar or the 5-8 Club, they differ on how they spell it too.


I first saw this burger on a show called Man vs. Food on the Travel Channel over a year ago. It caught my attention because 1. it's a burger inside out, 2. it originated in Minneapolis (not too far of a road trip!), and 3. lucky enough my brother just so happens to live just outside Minneapolis. I had the luxury of having my first Jucy Lucy this past Spring when visiting my brother and his family, we didn't go to either one of the co-called inventors of this burger but one of the many restaurants that now serve them. Let me tell you it was AWESOME! So moist, tender, juicy and oozing with cheese!!


A few weeks ago my dad dropped off a few Midwest Living magazine (don't ask me why he has them!) but he thought I might like looking through them for a bit, so I did. And low and behold one issue had this little masterpiece of a recipe, I've been so excited to make ever since! You MUST try it!

Juicy Lucy Burger - Makes 6 burgers ( I got 7!)

  • 1 cup soft bread crumbs
  • 1/2 cup milk or beef broth
  • 1 egg, lightly beaten
  • 1/4 cup seasoned fine dry bread crumbs
  • 2 Tbsp Worcestershire sauce
  • 1 tsp kosher salt or 1/2 tsp regular salt
  • 1/2 tsp ground pepper
  • 2 pounds 85% lean ground beef
  • 12 - 3/4 to 1 oz slices American, Swiss or Colby cheese, cut into quarters
  • 6 large hamburger buns
  • Assorted condiments; ketchup, pickles, tomatoes, etc

Directions

In a large bowl, combine soft bread crumbs and milk. Let stand 5 minutes. Stir in egg, dry bread crumbs, Worcestershire sauce, salt, and pepper. Add ground beef. Combine very lightly with fork (I found it easier to just use my hands). Shape meat mixture into twelve 1/2-inch thick patties, about 3 1/2 inches wide. I put my patties in between wax paper to get the right size and thickness without handling too much.


On each of 6 of the patties, arrange and slightly overlap 8 cheese quarters to within 1/2 inch of the edge. Top each with the remaining 6 patties. Pinch edges of top and bottom patties together to form a large patty, sealing holes. You will have a lump in patty where cheese lies inside. Chill patties, covered in refrigerator for at least one hour.

For a gas grill: Preheat grill. Reduce heat to medium. Adjust heat for indirect cooking. Place patties on grill rack; cover and grill for 14 minutes. Turn patties with a wide spatula and grill 10 to 12 more minutes to until meat is done ( an instant-read thermometer inserted into patties should register 160 degrees).

During the last 1 to 2 minutes of grilling open the buns and place cut sides down on the grill to lightly toast. Remove burgers and buns. Let burgers stand for 2-3 minutes before eating, the cheese inside is extremely hot! Serve on buns with assorted condiments.

** Note: Ingredients need to be evenly distributes, but it's important to handle ground meat mixture as little as possible for a more tender, moist burger.


Grilling Tip: This burgers' cheesy center turns extra juicy as it heats and melts. Help that center stay inside , don't press on the patties as the cook on the grill. A little bit of cheese may leak out anyways.


Oooey gooey goodness!


The Molten Cheese Center!

I uses a combination of Cheddar, Provolone and Pepper jack Cheeses.

Wednesday, December 29, 2010

Two Weeks in the Making

So I'm a little behind with this post but better late then never right? I've dipped cherries in chocolate before but never have I made REAL chocolate covered cherries (like the Cordial ones)...until now! I made these for Christmas and gave them as gifts! They actually are easier then I thought to make, the only downfall is your suppose to let them set for 1 to 2 weeks before eating to ensure the center sugar dough turns to that yummy sugary liquid. It's kind of like torture having them taunt you for 2 weeks. But I ended up putting mine away in the pantry so they were out of sight out of mind ;) Of course I had to taste test one shortly after I made it before the center liquefied and even though they are still good, they are not the same and so much worth the wait!


Chocolate Covered Cherries

  • 3 10-oz jars maraschino cherries with stems
  • 3 Tbsp butter softened
  • 3 Tbsp light colored corn syrup
  • 2 cups powdered sugar
  • 1 pound chocolate melting candy, cut up in pieces

Directions:

Let cherries stand on paper towels for 2 hours to drain thoroughly. Line a baking sheet with waxed paper; set aside.

sugar dough ball


In a medium bowl combine butter and corn syrup; stir in powdered sugar. Knead mixture until smooth, chill if too soft to handle. Wrap about 1/2 teaspoon powdered sugar mixture around each cherry. Place wrapped cherries, stem sides up on the prepared baking sheets. Chill for 1 to 4 hours or until firm.


In a heavy saucepan melt chocolate candy over low heat (I melted mine in a double broiler), stirring constantly until smooth. Line another baking sheet with waxed paper. Holding wrapped cherries by stems, dip one at a time into melted chocolate. If necessary, spoon chocolate over cherries to cover. Be sure to completely seal cherries in chocolate to prevent juice from leaking. Let excess chocolate drip off. Place chocolate covered cherries, stem side up, on the prepared baking sheet. let cherries stand until coating is set. To allow the powdered sugar mixture around the cherries to liquefy, store in a tightly covered container, in a cool, dry place for 1-2 weeks before serving.

The recipes says it makes 60 but I actually got 80 out of the batch! And after I gave the majority of them away I was sad I didn't keep more for myself because they are very comparable to the ones you buy at the store.

They taste just like the real thing! SUCCESS!!

Sunday, December 26, 2010

Merry Christmas To All!

Wishing Everyone a Very Merry Christmas, Safe Travels During This Holiday Season and Many Sweet Treats!
From My Family To Yours


Turtle Mania

I love making homemade treats especially during the Holiday season. Last year I didn't have a recipe for making my own turtles so I just winged it and they turned out great! This year I made them again but came across a recipe for them in one of the cookbooks I have from my mom's hometown. I have included both recipes, the recipe from the cookbook is Option A and the one I made up is Option B.

Option A:

Ingredients

  • 1 lb caramels
  • 2 Tbsp water
  • 3/4 lb pecans
  • 1 (16 oz) pkg chocolate chips

Unwrap all those caramels from the wrappers. Melt caramels in water. I melted mine over the stove, you could also use the microwave.

Arrange pecans in 36 groups of 4 about 2 inches apart on a baking sheet.

Put 1 teaspoon caramel mixture on each group of caramels.

Melt chocolate in microwave or in double broiler on stove. Place 1 teaspoon melted chocolate on each turtle.

And you have turtles!


Option B: My Own Recipe

Ingredients

  • 1 bag caramels
  • 1 bag pecans
  • 1 pkg Chocolate Almond Bark Preheat oven to about 300 degrees. Unwrap caramels, place on a baking sheet about 2 inches apart. Bake until caramels are just melted but not bubbly. Be careful not to melt too much or they will expand too much and be too thin.


    Take out of oven and place 4 pecans in each caramel piece while hot. Cool until caramels have firmed up.

    Melt 3-4 squares of chocolate almond bark in microwave for 30 second intervals until almost all the melted then keep stirring chocolate until fully melted and smooth. Either dip tops of caramels/pecans in the chocolate or spoon chocolate over each piece; let cool and harden.

**I prefer Option B as I think by adding the water to the caramel makes them a little more sticky and harder to handle but both ways are delicious!

Sunday, December 19, 2010

Purple Princess

Dave was showing off my work on the last Princess Cake and got me another order! One of his friends he works with was planning a big birthday celebration for his step-daughter who was turning 5. He loved the themed cake and requested a chocolate cake with chocolate frosting along with purple marshmallow fondant stripes and polka dots and a pink border.

Dave's worked with him for years and wanted to pick out the perfect tiara for the cake. It actually took him to different trips and 3 stores until he came home with the perfect purple Cinderella tiara and a Cinderella birthday candle (so cute!). We were invited to the birthday party which was held at Incredible Pizza so I actually got to see the reaction of the birthday girl seeing her cake. It was really exciting and cute to be there when everyone saw it, made me feel really good about my work!


Purple Princess Cake

I decided to use two shades of purple for the fondant.


Cake consists of two 9-inch round cakes and two 6-inch round cakes


Chocolate Cake
Source: Better Homes & Gardens Cookbook
  • 3/4 cup butter, room temp
  • 3 eggs, room temp
  • 2 cups all-purpose flour
  • 3/4 cup unsweetened cocoa powder
  • 1 tsp baking soda
  • 3/4 tsp baking powder
  • 1/2 tsp salt
  • 2 cups sugar
  • 2 tsp vanilla
  • 1 1/2 cups milk

Directions:

  1. Grease two 8-inch or 9-inch cake pans or one 13x9 cake pan. Set pan(s) aside. In a medium bowl combine flour, cocoa powder, baking soda, baking powder, and salt; set aside.
  2. Preheat oven to 350 degrees. In a large mixing bowl beat butter on medium to high speed for 30 seconds until fluffy. Gradually add in sugar, 1/4 cup at a time, beating on medium speed until well combined. Scrape sides of bowl, beat 2 minutes. Add eggs one at a time, beating after each addition. Beat in vanilla. Alternately add flour mixture and milt to butter mixture, beating on low after each addition just until combined. Beat on medium to high speed for 20 seconds more. Spread into prepared pan(s).
  3. Bake for 35-40 minutes, or until a toothpick inserted in center comes out clean. Cool cake layers in pans on wire racks for 10 minutes. Remove layers from pans, cool thoroughly on racks. Frost with desired frosting.


Chocolate Buttercream Frosting
  • 3/4 cup butter, softened
  • 1/2 cup unsweetened cocoa powder
  • 2 pounds powdered sugar
  • 1/3 cup milk
  • 2 tsp vanilla

Directions:

  1. In a large mixing bowl, beat butter with mixer on medium speed until smooth. Beat in cocoa powder into butter until combined.
  2. Gradually add 2 cups of the powdered sugar, beating well. Beat in milk and vanilla. Gradually beat in remaining sugar. Beat in additional milk (if needed) to reach desired consistency. This frosts tops and sides of two 8 or 9-inch layers, halve recipe to frost 13x9-inch cake (unless you like a lot of frosting!)

Friday, December 17, 2010

Sugar Cookies


Christmas is never complete until the sugar cookies have been made. Nothing says Christmas like cut-out Christmas cookies! This is one tradition I love and will always remember doing every year with my mom. The week before Christmas my mom would make the dough and keep in the refrigerator, I would always sneak a taste of the dough. Then we would spend an afternoon cutting out the dough with Christmas cookies cutters and decorating them with an assortment of sprinkles, colored sugars and frosting's. So much fun!!

The recipes I used for the sugar cookies is one of the best tasting sugar cookies I've had. They bake up nice and even and in no time. The cookies came out soft, sweet and chewy. The glaze didn't turn out exactly how I would have liked, it was a little thin and of course I ran out of powdered sugar so I couldn't make it any thicker (I would recommend added a bit more powdered sugar to the glaze), but it still was really good and went well with the sugar cookies. And of course all my good photos for these cookies got erased as well.


Best Rolled Sugar Cookies

Source: allrecipes.com

  • 1 1/2 cups butter, softened
  • 2 cups white sugar
  • 4 eggs
  • 1 tsp vanilla extract
  • 5 cups all-purpose flour
  • 1 tsp baking powder
  • 1 tsp salt

Directions:

  1. In a large bowl cream together butter and sugar until smooth. Beat in eggs one at a time, mix in vanilla. Stir in the flour, baking powder and salt. Cover and chill for at least one hour or overnight.
  2. Preheat oven to 400 degrees. Roll out dough on floured surface, 1/2 to 1/4 inch thick. Cut into shapes with cookie cutters. Place cookies 1 inch apart on ungrease cookie sheets.
  3. Bake for 6-8 minutes. Cool completely and frost with favorite icing.

Sugar Cookie Glaze

  • 1 cup powdered sugar
  • 1 Tbsp light corn syrup
  • 2 Tbsp water
  • food coloring
Stir powdered sugar, corn syrup and water together. Stir in desired food coloring. This glaze must be stirred each time you use it, if it is not stirred before each use it will begin to dry with a mottles look instead of a solid color.
*This glaze will dry to a hard shiny finish. Dries quickly.

Buffalo Style Pizza

We love pizza in our household. We usually have it once a week, whether we order one from a restaurant or just pop in a frozen pizza into the oven. But I've started to really enjoy making our own pizza. It actually can be even faster than order it and waiting for it to be delivered! Especially if using a pre-made pizza crust (which I love making things semi-homemade). So the other night I made Buffalo Style Chicken Pizza. I love buffalo chicken sandwich's, salads, wraps and wings, so of course this was delicious!! I'm not a fan of blue cheese and always substituted ranch dressing and that's exactly what I did here too.


I'm so disappointed I don't have a picture for this. When I went to upload my picture somehow they all erased from my camera instead!!! AHH! And I had some good photos of this pizza too.....mouthwatering good.


Buffalo Style Chicken Pizza

  • 3 chicken breasts, cooked and cubed
  • 2 Tbsp butter, melted
  • 2 oz. of your favorite hot sauce or wing sauce
  • Blue Cheese or Ranch salad dressing
  • 1 prepared pizza crust
  • 2 cups shredded mozzarella cheese

Directions:

  1. Preheat oven to 425 degrees
  2. In a medium bowl combine cooked chicken, melted butter and hot sauce; mix well.
  3. Spread a fair amount of salad dressing, then top with chicken mixture and mozzarella cheese (I used both mozzarella and cheddar).
  4. Bake for about 10 minutes or until crust is lightly golden brown and cheese is bubbly.

Tuesday, December 14, 2010

Thumbprint Cookies

I love trying my hand at making new recipes, I have too many to count that I want to try just not enough people to try them out on! This was my first attempt at making thumbprint cookies, this recipe is a chocolate topped thumbprint cookie also known as Brown-Eyed Susans. These were easy and fairly fast. There light, flaky and buttery and I rolled mine in sprinkles....sprinkles make everything better!!


Brown-Eyed Susans
Source: Allrecipes.com


  • 1 cup butter

  • 1/4 cup white sugar

  • 1/2 tsp almond extract

  • 2 cups all-purpose flour

  • 1/2 tsp salt

  • 1 cup powdered sugar

  • 2 Tbsp unsweetened cocoa

  • 1 Tbsp hot water (I used 3 to thin the frosting out)

  • 1/2 tsp vanilla extract
Directions:


  1. Preheat over to 375 degrees

  2. Cream butter and white sugar until light and fluffy. Blend in almond extract, add flour and salt; mix well.

  3. Shape rounded teaspoonfuls of dough into balls. Dough will be flaky but will come together and form balls when rolled by hand. Place on an ungreased cookie sheet. Roll in sprinkles of desired. Flatten middle of dough balls with thumb print. Bake 8-10 minutes or until golden brown around edges. Let cool.

  4. For frosting: Combine powdered sugar and cocoa. Add water and vanilla and mix well. Place chocolate frosting into thumb print indention of cooled cookies.

Sunday, December 12, 2010

Cookie Time!

This afternoon we went over to some friends of ours, Megan & Aaron, to watch the Bears games. So while the guys actually watched the game, us girls decorated sugar cookies.

Our beautiful edible artwork! There were a lot of cookies!


Although it looks like a loaf of bread it's actually a giant sugar cookie. It's the Peace on Earth cookie ;)

Momma's Birthday


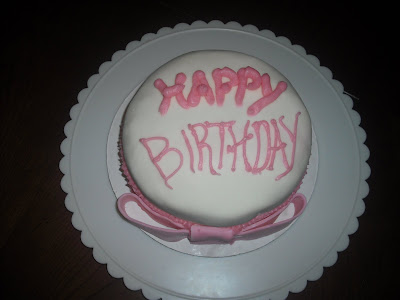
Last weekend I had left over batter from the Princess cake that I used to make a 6-inch round which I froze to use this week for the perfect size birthday cake for my mother. I found a recipe for White Chocolate Frosting (which I halved) and used the rest of the leftover Marshmallow fondant as well. This cake I covered in white fondant and used light pink fondant for the ribbon to make it look like a present!

My beautiful momma, she loved her cake!


White Chocolate Frosting
Source: Allrecipes.com
  • 6 (1 ounce) squares white chocolate, chopped
  • 2 1/2 tablespoons all-purpose flour
  • 1 cup milk
  • 1 cup butter, softened
  • 1 cup white sugar
  • 1 teaspoon vanilla extract

    1. In a medium bowl, combine 6 ounces white chocolate, 2 1/2 tablespoons flour and 1 cup milk. Cook over medium heat, stirring constantly, until mixture is very thick. Cool completely.
    2. In large bowl, cream 1 cup butter, 1 cup sugar and 1 teaspoon vanilla; beat until light and fluffy. Gradually add cooled white chocolate mixture. Beat at high speed until it is the consistency of whipped cream. Spread between layers, on top and sides of cake.

    Wednesday, December 8, 2010

    Marshmallow Madness

    Many people don't like fondant cakes. They either peel off the fondant on a cake because of it's taste or just steer clear of ordering fondant all together, but many bakeries use it in decorating cakes because of it smooth look and versatility to create just about any look desired. When I started getting interested in decorating cakes I came across a marshmallow fondant recipe that hundreds of people raved about and I was also recommended by another blogger to try it out. So I finally got the opportunity to try it out last week when making the Princess Cake. Let me tell you it was no easy feat!

    This recipe is easy enough to follow, however can be a bit of a mess. For me while beating the sugar into the marshmallow it all stayed clumped to the beaters no matter what I did. It eventually worked its way up higher and higher on the beaters that it started making its was into the hand mixer. So the last cup or so of powdered sugar I ended up kneading by hand. I was nervous at how it would turn out but by keeping my hands buttered up, the fondant came together well and turned out awesome! Plus the marshmallow fondant tastes really good! I will definitely be making it again.

    Ingredients

    • 1/4 cup butter
    • 1 (16 ounce) package miniature marshmallows
    • 4 tablespoons water
    • 1 teaspoon vanilla extract
    • 2 pounds confectioners' sugar, divided

    Directions

    1. Place the butter in a shallow bowl, and set aside.
    2. Place the marshmallows in a large microwave-safe bowl, and microwave on High for 30 seconds to 1 minute to start melting the marshmallows. Carefully stir the water and vanilla extract into the hot marshmallows, and stir until the mixture is smooth. Slowly beat in the confectioners' sugar, a cup at a time, until you have a sticky dough. Reserve 1 cup of powdered sugar for kneading. The dough will be very stiff.
    3. Rub your hands thoroughly with butter, and begin kneading the sticky dough. As you knead, the dough will become workable and pliable. Turn the dough out onto a working surface dusted with confectioners' sugar and continue kneading until the fondant is smooth and no longer sticky to the touch, 5 to 10 minutes.
    4. Form the fondant into a ball, wrap it tightly in plastic wrap, and refrigerate overnight. To use, allow the fondant to come to room temperature, and roll it out onto a flat surface dusted with confectioners' sugar.

    Monday, December 6, 2010

    Fit for a Princess

    Cake #2 Complete!

    Last Thursday I was asked by another one of my co-workers if I might be able to make her daughter a birthday cake for Saturday. She of course wanted a princess cake just like her sister had for her birthday last month (I did not get to make that one). I of course would be more than happy to make, even with the kind of late notice since I would have to actually make the cake that night in order to decorate it Friday night and have it ready Saturday! Since I'm just starting out making cakes I want to allow my self plenty of time as it's a learning process for me....trial by error.

    When thinking of what to do for this Princess Cake I looked around on the Internet and thought making a 2-tiered cake with a tiara on it would be so cute! The birthday girl's favorite colors are pink and purple which of course make a perfect princess theme. I thought this would finally be my opportunity to use fondant!! YEAH! I made the infamous Marshmallow Fondant which I will blog about tomorrow as that is a whole other story to tell!! However the end product came out great. I tinted some in pink, purple and green as an accent. For this cake I decide not to do the entire cake in fondant but used tinted buttercream frosting with fondant accents of ribbons, polka dots and flowers.

    Princess Ella's 5th Birthday Cake

    The front:
    Tier-1 is three 9 inch layers of Butter Cake and Tier-2 is two 6inch layers of chocolate both with buttercream frosting.

    The back


    Another Pumpkin recipe

    Chocolate Chip Pumpkin Recipe
    Source: Allrecipes.com

    • 3 cups white sugar
    • 1 (15oz) can pumpkin puree
    • 1 cup vegetable oil
    • 2/3 cup water
    • 4 eggs
    • 2 tsp vanilla extract
    • 3 1/2 cups all-purpose flour
    • 1 Tbsp ground cinnamon
    • 2 tsp nutmeg
    • 2 tsp baking soda
    • 1 1/2 tsp salt
    • 1 cup semisweet chocolate chips

    Directions:

    1. Preheat oven to 350 degrees, grease and flour three 9x5 inch loaf pans.
    2. In a large bowl, combine sugar, pumpkin, oil, water, vanilla, and eggs. Beat until smooth. Blend in flour, cinnamon, nutmeg, baking soda, and salt. Fold in chocolate chips.
    3. Bake for 1 hour, or until inserted knife comes out clean. Cool on wire racks before removing from pans.

    *Since this recipes make THREE loaf pans I used the entire bag of chocolate chips (plus I love chocolate so really it could only make this recipe better!). No matter how long I waited for each pan to cool for some reason the bottom of each bread loaf stuck to the pan. The first one I took out was a little so I waited on the second. The second even more stuck! And the third hardly any but some still did. So make sure you grease and flour your pans good! Because I obviously didn't, it still tastes good.

    Caramel Corn Time

    It's been many many years since I've made caramel corn and I'm 98% sure this was my first time making it all by myself. Every year my father-in-law plants sweat corn in our enormous garden. This past year along with the sweat corn, he planted popcorn! I've actually had a few people quite surprised by the fact that we actually plant and grow popcorn, I had "I didn't know you actually grow popcorn like regular corn" (it just doesn't appear in bags at the grocery store people! haha). It takes extra time and care to get it from the field to popcorn kernels. Luckily I have an awesome father-in-law who did all the dirty work for me and gave me the end product, a huge bag of popcorn kernels AND an old fashion popcorn popper...


    Get a load of this beauty!! A hand crank (yes you actually have to do some manual labor). As a child anytime we made our own popcorn on the stove it was usually just in a pot on the stove which easily burned if you weren't careful. This was my first time using this baby. I was told to just throw a handful of kernels in there, apparently my first idea of a handful was extremely overdone. Take One: I put a cup of kernels (a cups a handful right?!) and as popcorn started popping through the top, it was still popping! Only about half actually got a chance to pop before I had to start dumping it out. Take Two: Let's try a 1/2 cup....success! Hardly any left over kernels! Yeah me!


    For those of you who are completely oblivious to making popcorn other than opening a box and throwing a bag in the microwave, it's really quite simple. All you have to do is add a little oil to the pan to coat the bottom, add the kernels but not to much, and heat on med-low until the oil starts boiling and the kernels begin to pop. But remember to constantly move the pot so it doesn't stick to the bottom and burn and DO NOT open the lid to that a peek!! You will no doubt get splattered by hot oil or get hit my a flying popcorn kernel, trust me :) Then pour the popped corn into a bowl and all I do is sprinkle with kosher salt, that's really all it needs and it is amazingly good! You should try it!


    Now on to this sweet snack food called caramel corn...

    My Amish Friend's Caramel Corn
    Source: Allrecipes.com

    • 7 quarts plain popped popcorn
    • 2 cups dry roasted peanuts, optional
    • 2 cups brown sugar
    • 1/2 cup light corn syrup
    • 1 tsp salt
    • 1 cup butter
    • 1/2 tsp baking soda
    • 1 tsp vanilla extract
    Directions:
    1. Place the popped popcorn into two shallow grease baking pans. You can use roasting pans, jelly roll pans, or disposable roasting pans. Add the peanuts to the popped corn if using. Set aside.
    2. Preheat oven to 250 degrees. Combine the brown sugar, corn syrup, butter and salt in a saucepan. Bring to a boil over medium heat, stirring enough to blend. Once the mixture begins to boil, boil for 5 minutes while stirring constantly
    3. Remove from the heat and stir in the baking soda and vanilla. The mixture will be light and foamy. Immediately pour over the popcorn in the pans ans stir to coat. Don't worry too much at this point about getting the corn coated.
    4. Bake for 1 hour, removing the pans from the oven and giving each a good stir every 15 minutes. Line the counter top with waxed paper. Dump the corn out onto the waxed paper and separate the pieces. Allow to cool completely, the store in airtight containers or resealable bags.


    This stuff is good ad definitely lives up to it's over 600 reviews!

    Friday, December 3, 2010

    Technical Difficulties

    We are currently having technical difficulties with our computers and do have Internet access at home. Therefor will will be no blogging :( Hopefully we will get things fixed next week. Tonight I am decorating a Princess Cake so you all can look forward to the Princess post as soon as we are back up and running!
    Stay tuned....

    Friday, November 26, 2010

    My Mom's Secret

    Yup that's right this recipe includes an entire box of Twinkies...your thinking this is totally lowfat right!?! ;)


    I'm not exactly sure where my mom found this recipe for a year or two ago she brought this for a holiday gathering and my husband fell in love! My mom might not be the world's best cook but she can sure find some good desserts. So when talking with my husband about making a pie for Thanksgiving, he piped in and suggested I make this instead. He can actually eat half this pan in one sitting (sick huh?!) So as a compromise, I made both! I hope you try it!


    Layered Pumpkin Dessert

    • 1 box Hostess Twinkies (10)
    • 1 pkg (8oz) cream cheese, softened
    • 1 cup confectioners sugar
    • 1 container (8oz) whipped topping, thawed, divided
    • 2 pkgs (3.4 oz ea) instant vanilla pudding
    • 1 can (15oz) pumpkin
    • 1-1/2 tsp pumpkin pie spice
    • 1 cup milk
    Directions:
    1. Slice Twinkies in half lengthwise and place cream side up, in a single layer in a 9x13 pan. Using a mixer, blend together cream cheese, sugar and 1/2 of whipped topping until smooth. Spread evenly over Twinkies.

    2. Combine pudding, pumpkin, pumpkin pie spice, and milk. Whisk until well blended and layer over cream cheese mixture.

    3. Carefully spread remaining whipped topping over pumpkin. Lightly sprinkle with pumpkin pie spice.

    4. Refrigerate several hours until set.

    My 1st Pumpking Pie

    For Thanksgiving dinner I was put in charge of making my first pumpkin pie! I've actually been looking forward to this since making my own pumpkin puree as you may remember from this post. So of course I opted for a FRESH pumpkin pie. After doing some research I found many people say what a different there is between making a pie using canned pumpkin compared to fresh pureed pumpkin, so I couldn't wait to see what people I knew actually thought. This recipe definitely lived up to all it's reviews! I must warn you if you use this recipe, it is very liquidity BUT fear not it turns out perfect :) Once I mixed all the ingredients and poured them into the pie shell I had to be extra careful when placing it into the oven as to not have any spill. Even when it was fully cooked it looked like it should be cooked longer but my toothpick came out clean. TRUST your toothpick! It may look like it needs more time but it doesn't and will turn out perfect!

    All the ingredients you need!


    Mrs. Sigg's Fresh Pumpkin Pie

    • 1 sugar pumpkin
    • 1 recipe pastry for a 9 inch single crust pie
    • 2 eggs
    • 1 cup packed light brown sugar
    • 1 tablespoon all-purpose flour
    • 1/2 teaspoon salt
    • 2 1/2 teaspoons pumpkin pie spice
    • 1 (12 fluid ounce) can evaporated milk

    Directions

    1. Cut pumpkin in half and remove seeds. Place cut side down on a cookie sheet lined with lightly oiled aluminum foil. Bake at 325 degrees F (165 degrees C) for 30 to 40 minutes, or until the flesh is tender when poked with a fork. Cool until just warm. Scrape the pumpkin flesh from the peel. Either mash, or puree in small batches in a blender. Increase oven temperature to 450 degrees F (230 degrees C.)
    2. In a large bowl, slightly beat eggs. Add brown sugar, flour, salt, 2 cups of the pumpkin puree, pumpkin pie spice, and evaporated milk. Stir well after each addition.
      Pour mixture into the unbaked pastry shell. Place a strip of aluminum foil around the edge of the crust to prevent over browning.
    3. Bake 10 minutes at 450 degrees F (230 degrees C), then reduce the oven temperature to 350 degrees F (175 degrees C). Bake an additional 40 to 50 minutes, or until a toothpick inserted near the center comes out clean. Remove the strip of foil about 20 minutes before the pie is done so that the edge of the crust will be a light golden brown. Cool pie, and refrigerate overnight for best flavor.